Warm up car and set idle to nominal. For my '77 280z it is 800rpm.
Vacuum Measurement
Warm up car and set idle to nominal. For my '77 280z it is 800rpm.

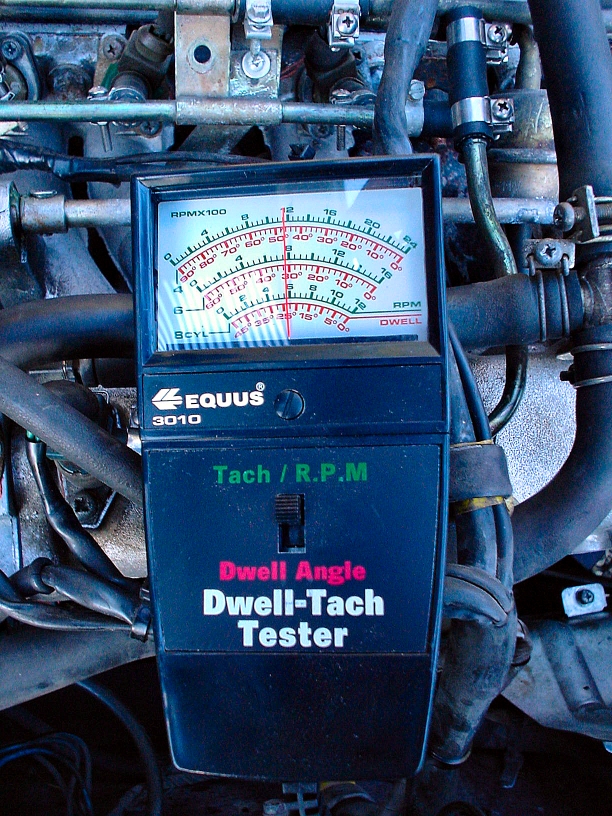
Here are the two connection points for the tach signal.
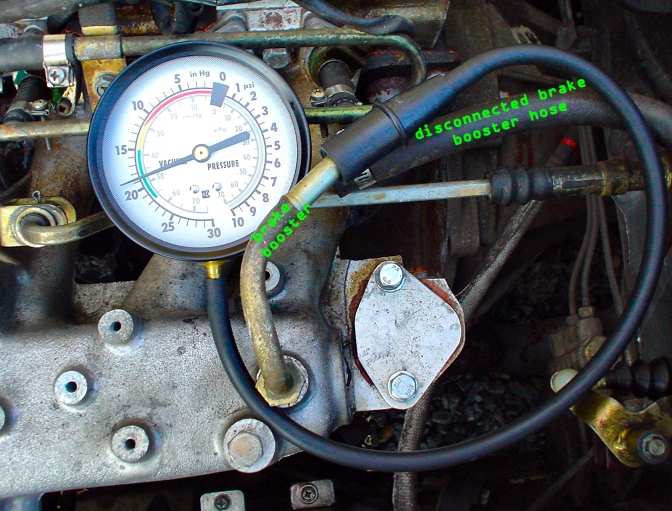
Connect vacuum meter to intake manifold. I found the connection to the brake
booster to be easiest.
Here are the results for my 280z with a worn old engine:
| RPM | Vacuum (in. of Hg) |
| 600 | 17 |
| 800 | 18.5 |
| 1000 | 19 |
| 1200 | 19 |
| 1600 | 20 |
| 2300 | 19.5 to 20.5 |
| Reving | shoots down to between 5" and 10" on inital RPM rise, holds at 20" at high RPM then over shoot to 24" on throttle release |
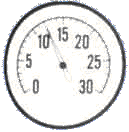
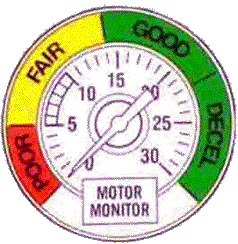
Typical vacuum readings at idle are 17" to 21" of Hg. Performance cams can lower this.
Common Problems
Trouble-shooting with a vacuum gauge
|
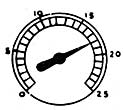
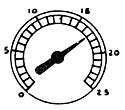
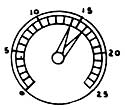
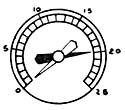
Idle
(Normal Vacuum) An engine in good condition should have a gauge reading of 17 to 21 and hand should be steady. |
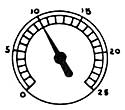
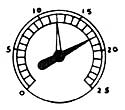
Idle (consistent but very low
reading) A steady reading below 5 indicates a leaky manifold, manifold gasket or carburetor gasket. Also check heat riser. |
Idle (consistent but low) When gauge needle is steady at about 8 to 14 it generally indicates incorrect valve timing. |
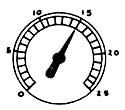
Idle (consistent but mildly low) A reading lower than normal with the hand steady indicates that rings are in poor condition. |
|
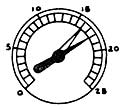
Idle (consistent but mildly low
reading) If normal is 20 inches and needle should go to approx 14 check timing. Spark may be retarded. |
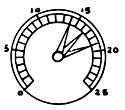
Idle (consistent but slightly low) A reading of 13 to 16 generally indicates incorrect ignition timing. |
||
|
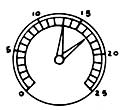
Idle (with random mild drop) When the hand drops occasionally from 3 to 5 points, from the normal reading, it generally indicates a sticking valve. |
Idle (with consistent mild drop) A burned valve will cause the needle to drop back several divisions each time that particular cylinder operates. |
Idle (with consistent slight drop) Leaking valves also show up on the gauge by the needle dropping back 3 or 4 divisions, whenever that valve opens. |
Idle (with occasional mild drop) Occasional drop as cylinder is firing may denote valve open or plug not firing.
|
|
Idle (constant mild drift) Poor adjustment of the carburetor will cause the needle to float slowly between 12 and 16. |
Idle (mildly low with constant small
drift) When needle drifts slowly between 14 and 16 it generally indicates that plug gaps are too close, or breaker points are not properly synchronized. |
Idle (with constant
large fluctuations) This action usually indicates a leaky head gasket. |
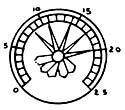
Idle (with fast vibration) When needle has a fast vibration between appoximately 14 and 19 it indicates loose valve guides. |
|
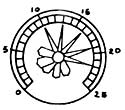
Cruising (big variations) Wide variations of needle increasing with motor speed indicates weak, or broken valve springs.
|
Opening and
closing throttle quickly
reading on an engine in good condition should drop to 2 and come back to 25. |
Idle (slow steady drop) Normal reading at start, but gradually drops, indicates choked muffler. |
|
Wayne's World
The best place to measure manifold vacuum is by
using a "T" fitting in the vacuum line going to the FPR. The vacuum on
this line directly controls the fuel pressure. If you have 33 PSI of fuel
pressure the manifold vacuum should be ~ 5 inches. One of the gauges may be out
of calibration. Don't panic!
Start the engine and remove the vacuum line from the FPR and plug the end of the
hose with a golf tee. You now have 0 inches of vacuum at the FPR vacuum port and
the fuel pressure should be 36 to 37 PSI. Record the pressure you actually see
at this time.
Now with 16" of vacuum you should have 29 to 30 PSI of fuel pressure. You
say you get 33 PSI so your gauge may be out (reading high) by 3 to 4 PSI. If you
get ~ 40 PSI with the vacuum line to the FPR disconnected then your gauge is
out, so just remember to subtract the difference.
Now there is one other piece of science you have to deal with. Altitude! The 36
to 37 PSI figure is based on being at sea level! I think that
for every 1,000 ft above sea level the fuel pressure should go up by 1 PSI. I
had an altitude correction table but I can't find it now (the altitude does not
change frequently around here anyway). So if you live around 3,000 ft then your
pressure reading could be perfectly within spec. Check with your local airport
or anyone you know that is a pilot and let us know your altitude.
Your idle speed will affect all of this also. It should be more around 700 to
750 RPM. As idle speed goes up manifold vacuum will go down slightly. Also at
800 to 850 RPM the mechanical advance counter weights will start to affect the
timing.
The idle contacts in the TVS should be closed also. This is why, when you set
the timing, you are supposed to put a jumper in the TVS connector OR
make certain that the TVS is adjusted correctly and that you (and the ECU) sees
continuity on pins 29 and 30 of the ECU connector at idle with the throttle
closed.
This is covered in the FSM under Throttle Vane Switch Tests (EF-26 and EF-22)
and has pictures of what pins to test in the connector. So while you are
checking pins 29 and 30 check the resistance of the CHTS / WTS on pin 14 as
previously requested.
The resistance of 232 ohms is a bit low, the ECU may think the coolant temp is
above 200 F, 470 ohms would be ~ 160 F, But the most important thing, at this
point, is to measure the resistance seen at pin 14 and chassis ground.
Have you looked into trying to find an empty spot in the thermostat housing to
install the CHTS / WTS?
If the cold start valve isn't hooked up how about disconnecting the fuel line
going to it and putting a plug on the line just to make certain the CSV is not
leaking? If it is still installed in the intake has it got a good gasket between
it and the manifold?
You have come a long way on this project and I hope that I have helped you. Tell
your significant other to buy you a bouquet of flowers or a case of motor oil as
a reward for your efforts!
Wayne Monteath
August 2001. Mastering the Basics |
||
|
There's nothing more basic
than the fact that an engine is just a big air pump. It draws in air
by creating a low-pressure area in the intake manifold and cylinders,
compresses the air, mixes in a little gasoline, lights a fire,
generates heat and pressure and finally pumps out the spent exhaust.
Our preoccupation today with things electronic sometimes makes us
overlook old-fashioned mechanical symptoms of problems and the
mechanical test equipment used to troubleshoot them. Vacuum gauges are
often in this category, but the insight that a vacuum gauge can
provide is as valuable today as it was 30, 40 or 50 years ago. |
 Well,
many people have forgotten about this simple and easy test to perform on an
Engine to see what exactly is going on with your Auto.
Well,
many people have forgotten about this simple and easy test to perform on an
Engine to see what exactly is going on with your Auto.
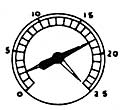
Normal Stock Engine